

Mastering the Roperoller
If you spend time camping, overlanding, working in the garage, or organizing gear outdoors, a Roperoller can become one of the most versatile tools in your setup. Its spring-loaded cam design allows paracord to slide freely in one direction while locking securely in the other.
In this guide, we’ll walk through four effective ways to rig a Roperoller, from simple cinching setups to advanced tie-down systems for awnings, dog runs, and clotheslines.
Now let’s break down the four main rigging methods.
1. The Wrap Around
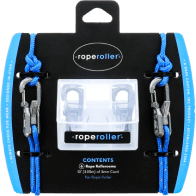
This is the standard configuration your Roperoller typically comes with right out of the package.

Setup
- Tie a bowline knot onto the carabiner
- Feed the tail end of the paracord through the Roperoller cam
This setup is excellent for demonstrating how the Roperoller works because you can clearly see the locking mechanism in action.
Best Uses: Bundling firewood, cinching small items together, quick utility applications

Drawbacks
In tie-down situations, tightening can become awkward because the Roperoller may slide unless you hold the opposite side. This means it’s not naturally a one-handed operation.
While manageable, there’s a better method if you need more stability.
2. The Girth Hitch Setup
The girth hitch method solves the sliding issue from the basic setup and creates a much more stable anchor point.

How to Rig It
- Make a bight in your paracord
- Feed the bight through an attachment point
- Pull both rope ends through the loop
- Tighten the girth hitch
- Route the tail around your gear or anchor point
- Feed the tail through the Roperoller
Why It Works Better
Because the Roperoller is anchored in place, you can tension the line with one hand without the entire system sliding around.
Best Uses: Permanent tie-down points, vehicle storage setups, frequently used anchor locations, gear organization systems

If you regularly use the same hard point, this is one of the cleanest and most efficient methods available.
3. The Direct Connect
This setup reverses the previous arrangement by attaching the rope directly to the anchor point while keeping the rope roller clipped in place.

Setup Instructions
- Remove the Roperoller from the paracord
- Attach the paracord to a hard point
- Clip the Roperoller carabiner to the hard point
- Feed the rope tail through the Roperoller
This creates a highly adjustable tensioning system.
Best Uses: Awnings, tarps, tent guy lines, adjustable shelters

One major advantage is flexibility. The Roperoller remains attached to your awning or anchor point while the opposite end can secure to trees, stakes, rocks or vehicles.
This method creates a quick and reusable tensioning solution for outdoor shelter systems.
4. The 2-to-1
Sometimes you don’t have a small attachment point available. Maybe you’re wrapping around a large tree, a roof rack, or another oversized object.
How to Rig It
- Attach one end of the paracord to your first anchor point
- Run the line to the second anchor point
- Tie an overhand knot on a bight near the second anchor
- Clip the Roperoller carabiner to the loop you created
- Wrap the tail around the large object
- Feed the tail back through the rope roller
- Tension the line
Best Uses: Dog runs, clotheslines, large tree anchors, camp utility lines, vehicle-to-tree setups

This is one of the most adaptable methods because it works even when traditional clipping points aren’t available.
Choosing the Right Rigging Method
Each setup serves a different purpose, and knowing when to use each one can make your camp or gear setup significantly more efficient.
| Method | Best For | Main Advantage |
|---|---|---|
| Wrap-Around | Bundling and cinching | Simple and fast |
| Girth Hitch | Tie-downs | One-handed tightening |
| Direct Connect | Awnings and tarps | Adjustable anchored system |
| 2-to-1 | Trees and oversized anchors | Works without clip points |
Final Thoughts
The Roperoller is one of those deceptively simple tools that becomes incredibly useful once you understand multiple rigging techniques. Whether you’re tensioning an awning, organizing camp gear, building a clothesline, or setting up a dog run, the right setup can save time and frustration.
Experiment with these four methods and adapt them to your own outdoor systems. You may even discover entirely new ways to use a Roperoller in the field.
And if you do invent a new rigging technique, film it and share it—you never know who it might help next.


